

PAINT + COLOR & HOW TO CHOOSE
10 tips for implementing paint and color into your home. Ideas and thoughts on color from an Interior Designer/DIYer/Artist.

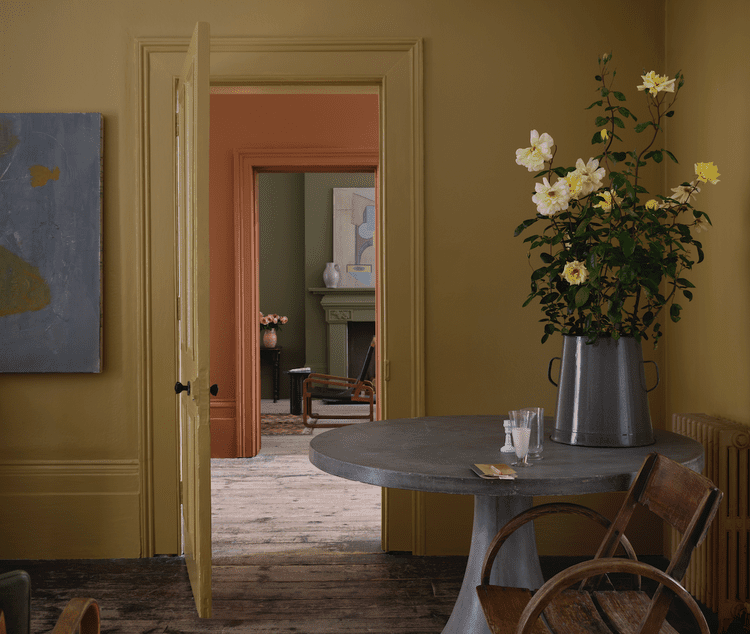
Image: Farrow & Ball

INTRODUCTION:
Color is an amazing tool. It can have a significant impact on the way we use our space and how we feel in it. It creates a narrative, a story about who we are and a glimpse into our personalities and character. It gives our visitors an open door to something some of us hold tight under lock and key; a true reflection of who we are on the inside, a visual diary shall we say? Yes, on one hand color can feel like serious business, but it can also be so much fun if we let ourselves enjoy it and try not to take it too seriously. An oxymoron? Maybe so, but I suppose two things can be true at once.
If you love color, but struggle with how to implement it into your home, you are not alone. Choosing to add color to your wardrobe vs. styling your entire home with color can feel like a huge commitment, both from a financial standpoint and a design perspective. Many of us have spent years resorting only to whites, grays and neutrals in our interiors and in turn we’ve created a safety net of what feels comfortable. Now, that zone of comfort, has made it very difficult to break through and explore more options when it comes to paint color. Now, I have no opposition to neutral color schemes if it fits the space and the homeowner, but I also know many people want to implement color in their homes but don’t quite know how to navigate their choices. So, whether you’re ready to move on from wall to wall neutral, or you embrace color currently and are just looking for some additional guidance please read on.
Image: Vintage Color Chart (You can buy this as printable art on Etsy - click image for link):
My goal is not to provide you with too much technical knowledge or specific color schemes, but easy to digest tips and tricks that will hopefully help you make color decisions on your own with confidence. You can apply these concepts to paint or for any use of color in your home.
1.) Try not to let fear prevent you from getting started:
A major roadblock one can face with color (and pattern for that matter), is using the fear of getting sick of a color as a reason to forgo using it all together. I would like to counteract this concept by affirming we can tire of a neutral setting just as quickly as we can tire of color. In fact, if a wall-to-wall neutral home isn’t a true reflection of who you are, you may tire of it much quicker than using a color that you really enjoy. Also keep in mind that a predominately neutral home, can still implement color in an affective and complementary way.
2.) Don’t be afraid of falling victim to trends:
A discussion that has stuck with me throughout the years was one in college by an instructor of mine on the 20-year lifecycle of design trends. He sheepishly remarked how in two decades we would all be cringing at the work our instructors and other interior designers were producing at the time. It felt as though he was already embarrassed for what was to come 20 years down the road; as if it was inevitable, not even a question that this would come to be. I scoffed at this prospect and thought it could hardly be true. Now, 20 years later, that lifecycle seems only but 5-10 years thanks to social media and our consumption-centric society. What I’m trying to say is no matter how hard we try; we are always going to be a subject of our time. Rarely, do you walk into a home decades after it was last touched and feel as though it is as fresh and contemporary as the day it was finished. The best we can do is make selections we truly enjoy and be weary of what feels and looks fleeting. Try to avoid splurging on those items and introduce trends you like on lower commitment finds. Remind yourself if you like it, there is no reason to justify it, to yourself or anyone else, even if it does happen to be a so called “trend”. It’s an overused word and puts too much pressure and apprehension into decision making.
3.) Start small:
Trying to decide on a color scheme for an entire home can be daunting. Start with one space at a time and build on from there. Once that space feels right, making choices that coordinate for adjacent rooms will come with much more ease. If you aren’t feeling brave enough or your budget doesn’t allow for painting walls or investing in larger furniture items with color, try starting with accessories. Add color to throw pillows, blankets, art, rugs, and home décor. Adding these items to the foreground are a great compliment to a neutral background.
4.) How to make your color choices/where to start:
If you struggle to know exactly what paint colors you might like, or which colors compliment each other well, there are many ways to find inspiration or to point you in the right direction. First, start by thinking about how you want the space to feel. From there, you can narrow in on which colors make you feel that way. You can also find inspiration from colors you already have and enjoy in your home, Try implementing colors from your art, bedding, rugs etc. Now, there are many theories on color, but I happen to believe everyone perceives and is affected by color differently. So only you (and your partner), can determine what will feel right for your space.
5.) You: “Yea, Yea, but WHAT colors should I use?”
Sorry, I can’t give you a direct answer to that without knowing you or your home! But what I will say is try using tonal colors, or in layman’s terms muted colors. Here is where things get a little more technical, but I promise, it’s not that bad. A tone is a color that has both white and black added to it (also known as grey). This helps to create more complexity within the color and adds a calming effect. Bonus points if you choose a secondary color. For a refresher on color basics, a secondary color is a color created by mixing two primary colors. The result is a color that is comprised of 4 parts: 2 color hues plus black and white. This adds maximum depth and interest. Now, don’t take it too literally, for example the color does not need to have equal parts blue and green to qualify! By using tonal colors, you are less likely to tire of a color in the long run because it has this added depth and complexity. In some light, it might lean more toward one color than another, offering a variety of color perspectives throughout the day. Another advantage to using tonal colors is their ability to play well with a neutral base, making it easy to coordinate your décor. If you choose to pair two tonal colors together, regardless of your choices, they are typically a good match since each are grounded with both white and black.
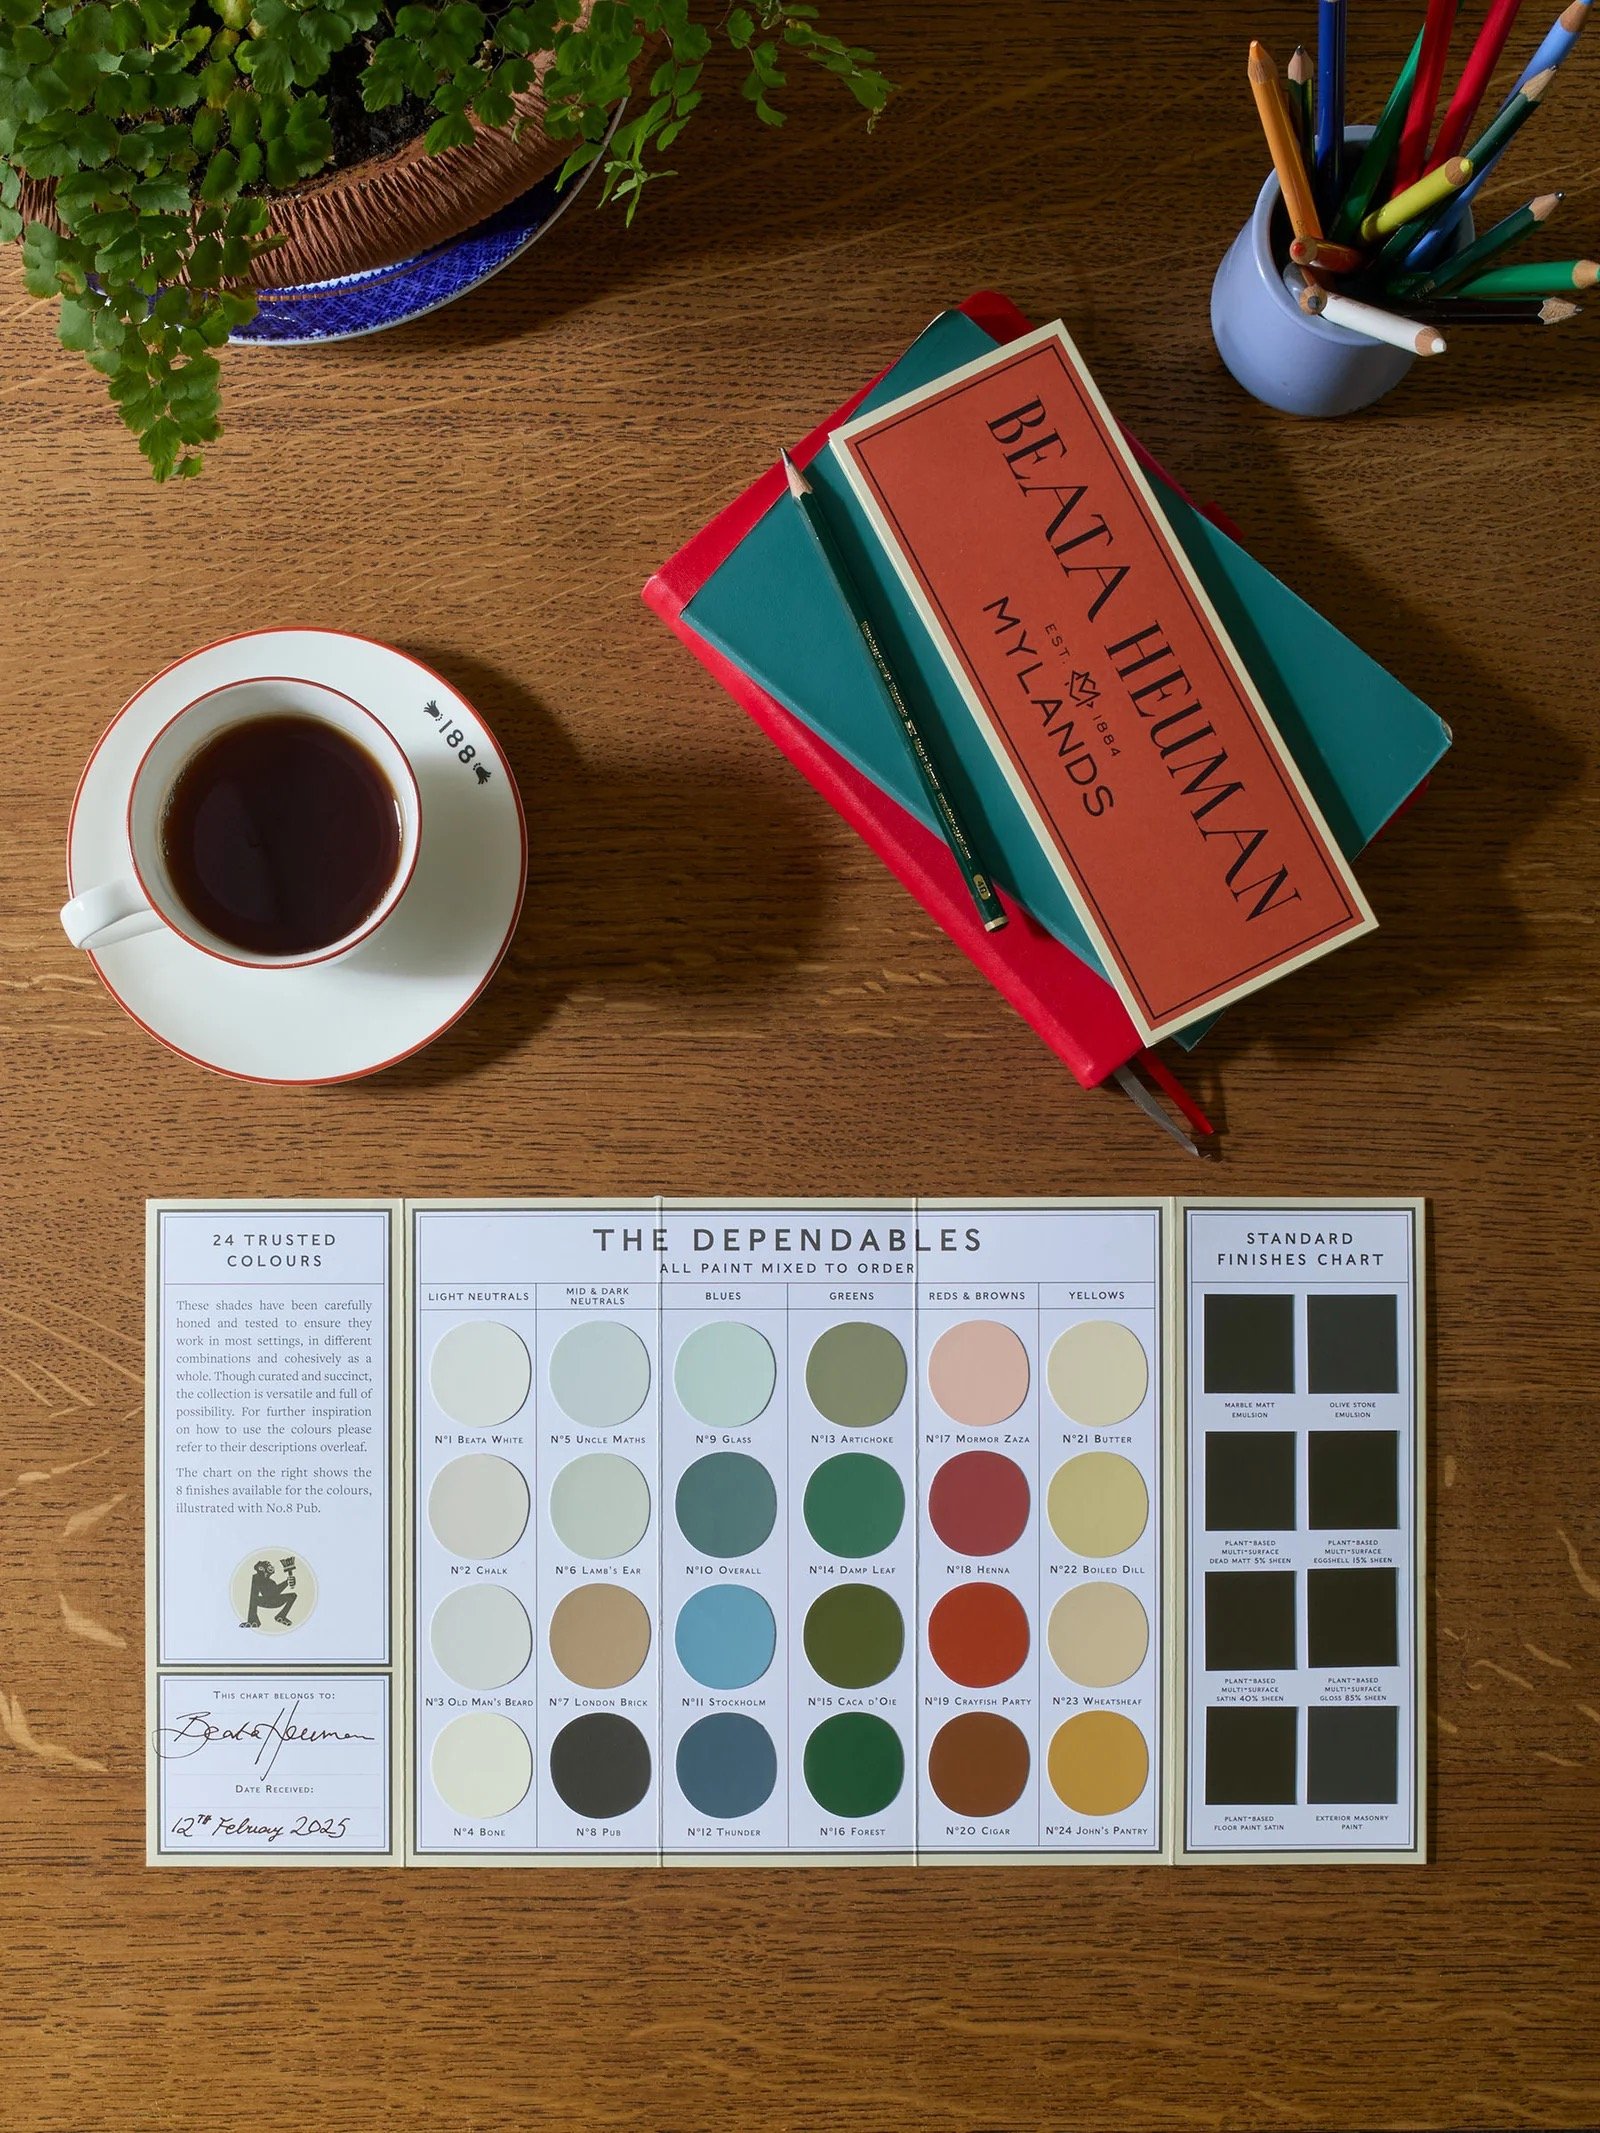
6.) Try leaning on small selection, curated paint brands:
If you are struggling to select specific colors, this is a great place to start. Some brands to explore are Farrow & Ball, Clare Paint, and Backdrop. These brands are often higher-end paints, but don’t let that stop you from grabbing a sample card and using it for inspiration. I also recommend exploring the Historical collections within paint brands. Benjamin Moore and Sherwin Williams are great options for this. Their colors are typically muted but have also literally stood the test of time. It’s much less overwhelming to choose from a curated selection of paints. A new one that I am looking forward to will be available in the US starting this spring by the renowned Interior Designer, Beata Heuman, with literally only 24 colors to choose from.
Image: https://beataheuman.com
7.) Building a palette can feel intimidating but trust your intuition:
To keep things simple, you can start with a monochromatic scheme sticking to one color hue, possibly in different shades and tints (dark and light) for variation, mixed with a neutral base. Analogous schemes are another good choice. They use colors that are next to one another on the color wheel and can be a less complicated choice. In the end, that gut feeling of what feels right should lead you in the right direction.

8.) Other quick tips and ideas for implementation:
Thinking outside of the box in terms of where to apply paint color can help a space feel more intriguing and even make you feel more comfortable with the idea of color (believe it or not). Try using the same color on the trim as well as the walls. White trim with a saturated color can feel busy and overly contrasting. When you paint the trim the same color as the walls, it makes the space feel larger, more relaxed and can even make a color feel more neutral. If you are feeling extra brave, expand to the ceiling. Of course, this is not ideal for all spaces. I cannot stress enough to start in one room and expand from there as you gain comfort and confidence in your choices.
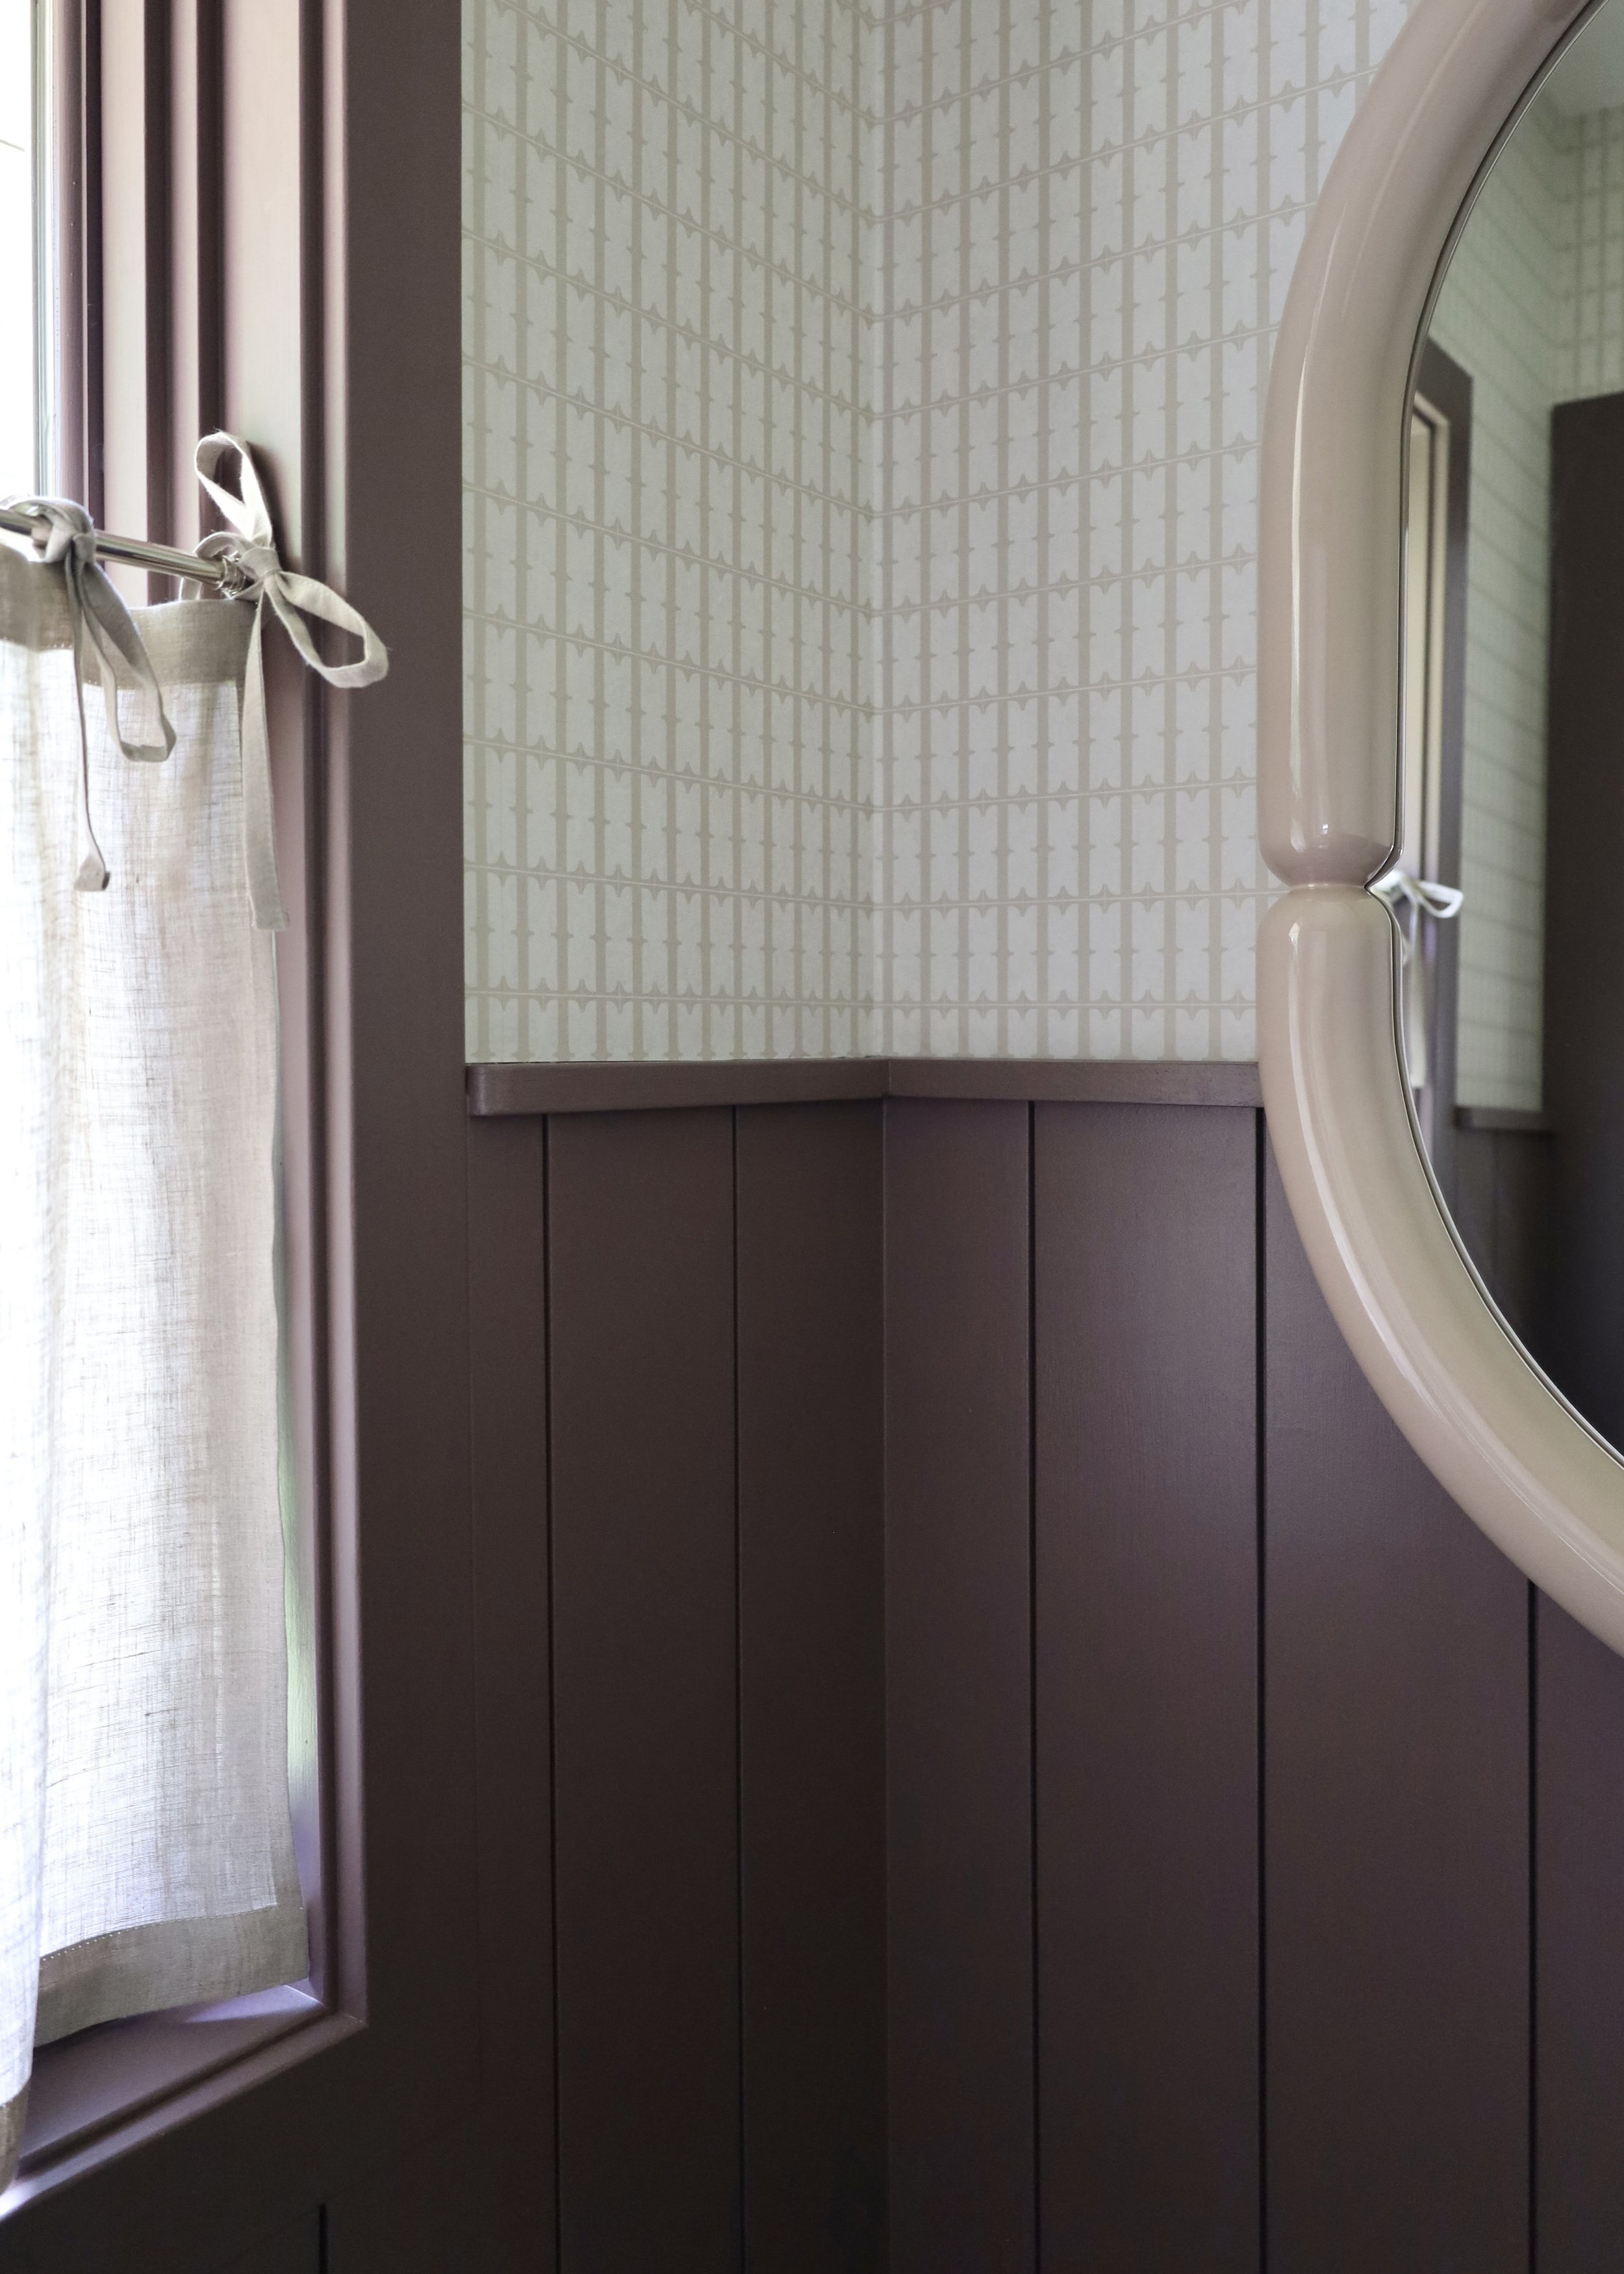
Image: Plural Design Studio
Color: Clare Paint | Dirty Chai
9.) How samples swatches look different from full application:
My number one suggestion when exploring paint colors is to sample, sample, sample! Use sample cards/swatches as a first draft for selecting your favorites only. Once you have narrowed it down to a handful or so make sure to purchase a real paint sample of your final choices. There is an added cost here, but trust me it’s so worth it to make sure you get the outcome you are looking for. Color look so much more saturated and vibrant once applied to the wall in large scale. This is one of the reasons I love tonal/muted colors.
10.) Don’t forget, it’s just paint!
Yes, painting is hard work and mistakes do happen…. BUT you can always repaint. Even if you don’t like what you’ve chosen at first, try living with it for a few months (at least). This will give your pocket book, and if you are DIYing your body some much needed rest before trying again. Sometimes there’s an initial shock that just takes some getting used to. Also, a change art and accessories can always help adjust the ambiance. Hope this helps and best of luck on your painting journey. Links from brands/collections mentioned above follow.
LINKS TO RESOURCES MENTIONED ABOVE:
Clare Paint (A zero VOC brand, Greenguard Gold certified)
Backdrop (Green Wise certified)

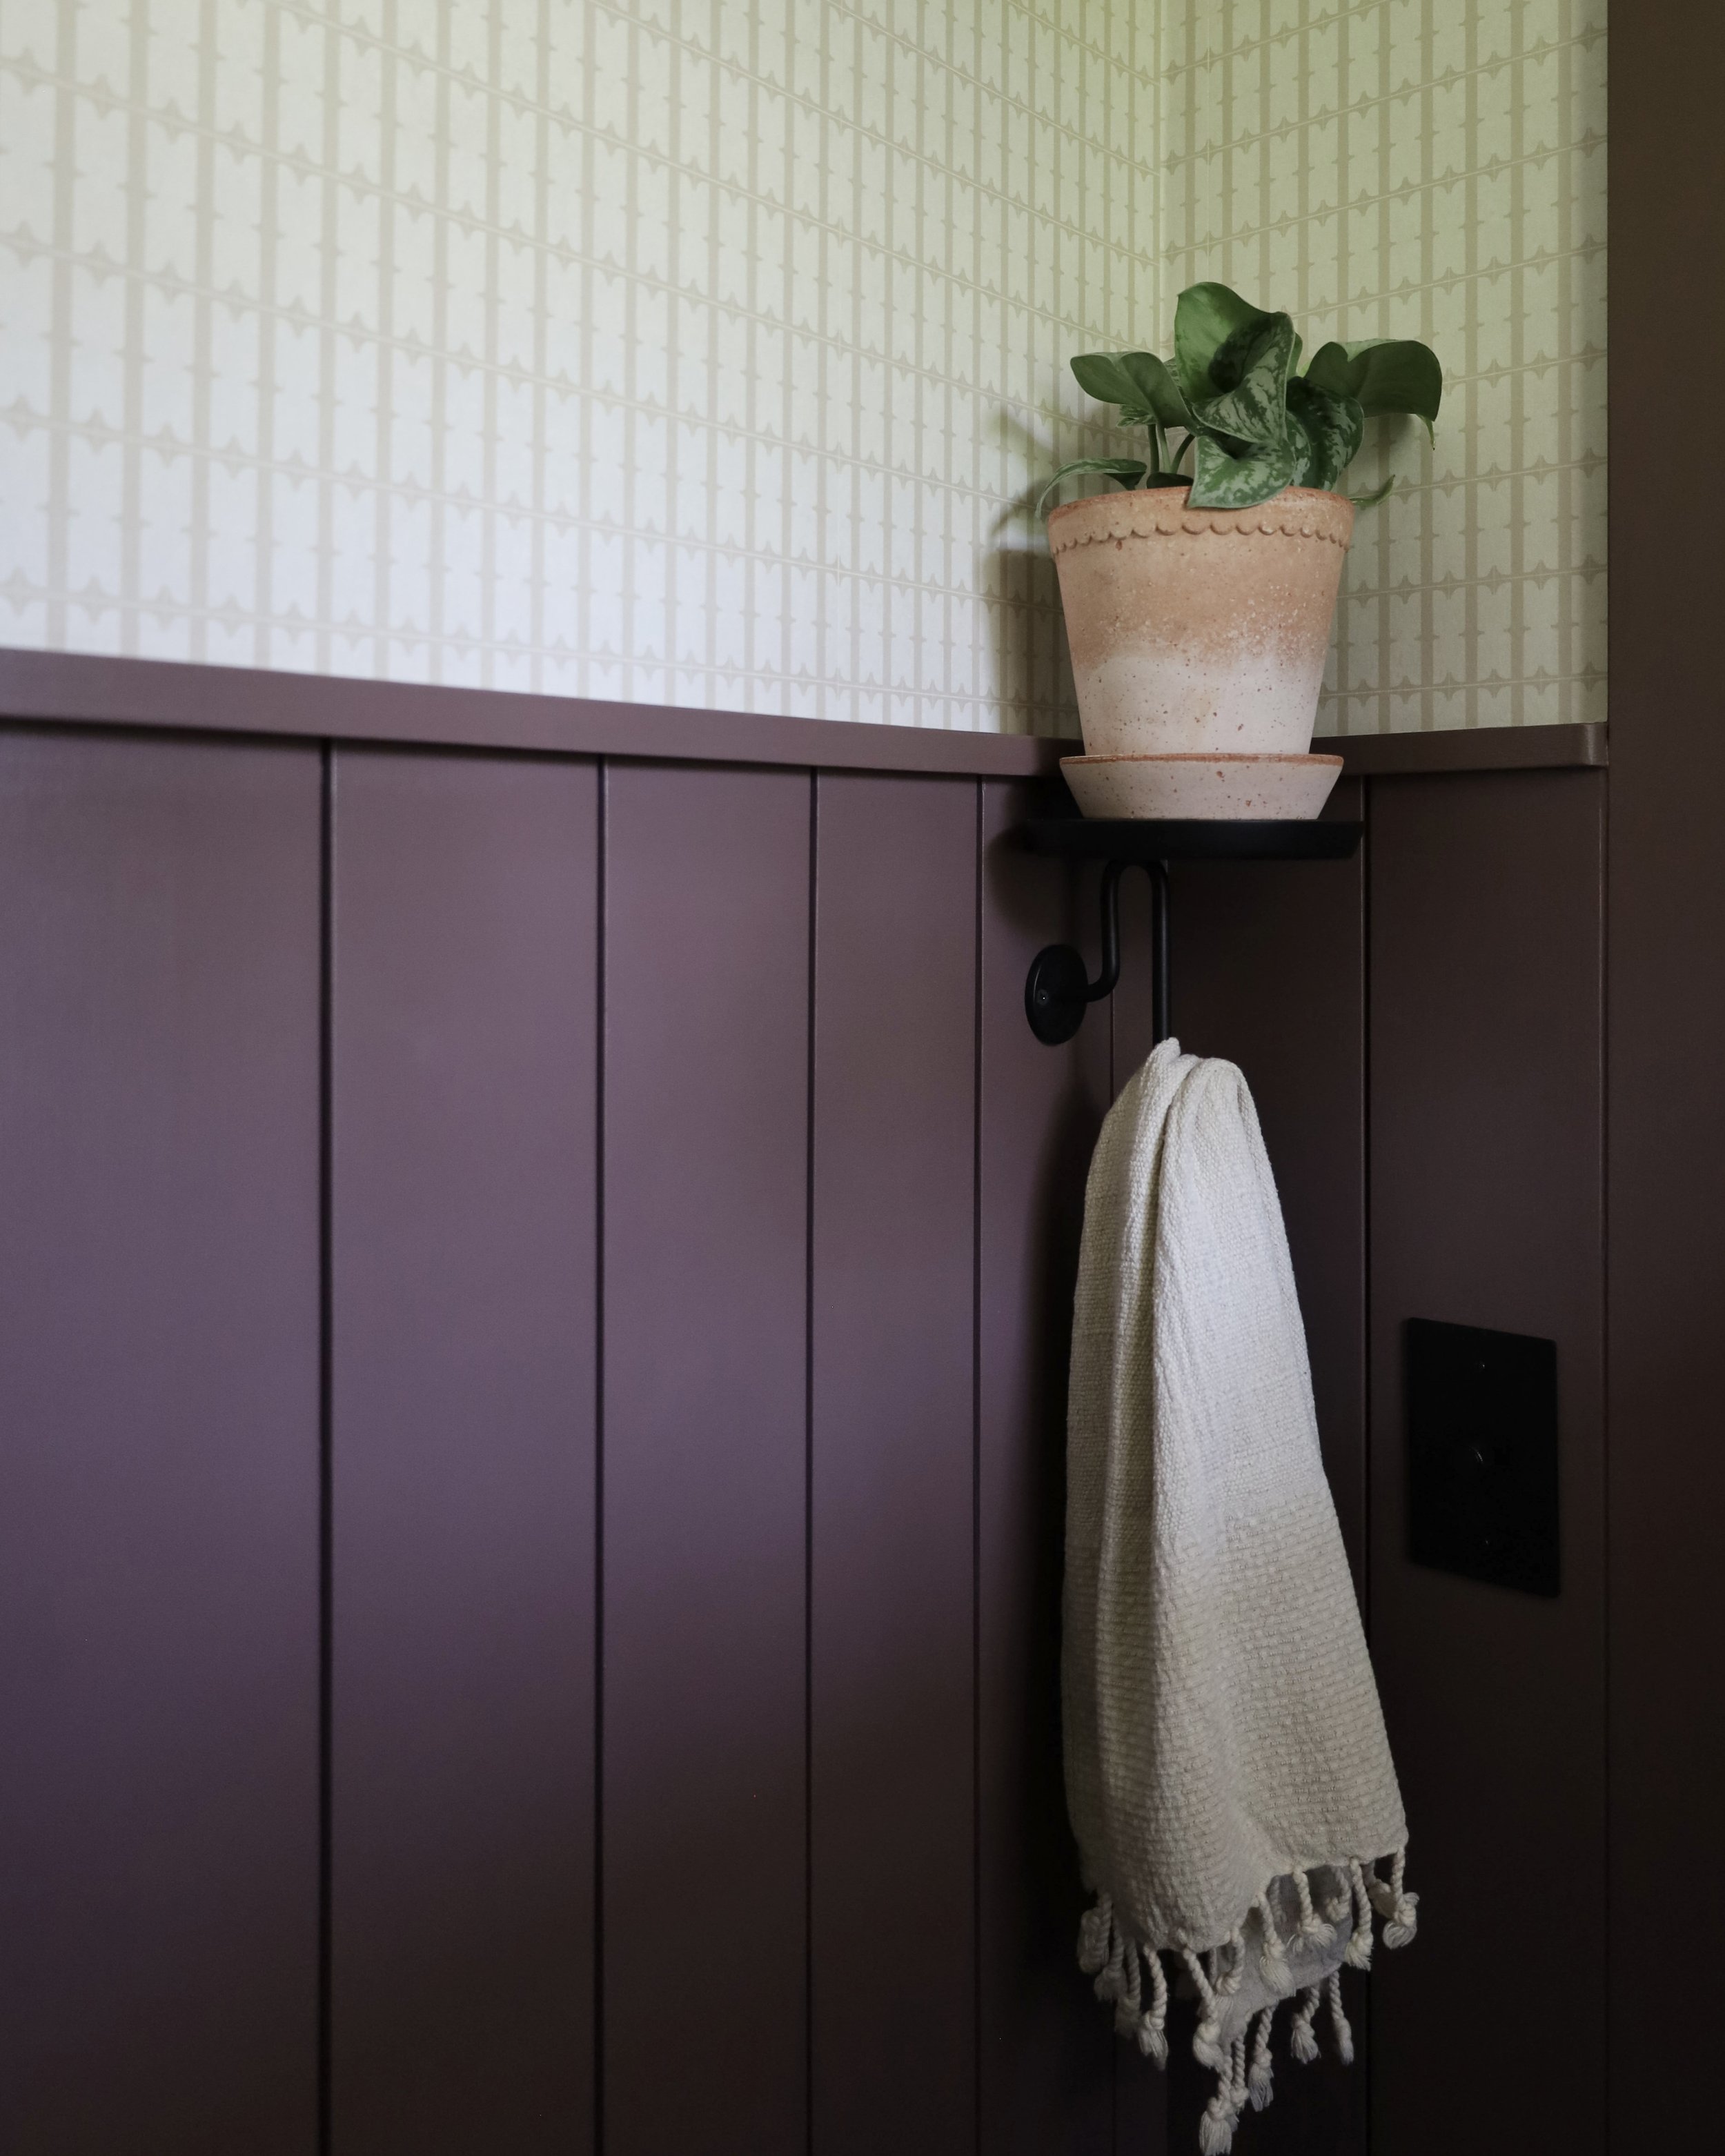
This is our current home paint palette; a warm white neutral base with supporting tonal hues in bathrooms, bedrooms, on trim and cabinetry.
Good luck on your painting journey! I hope this has provided at least some assistance on making your selections.

A BATHROOM REFRESH GONE WRONG (KIND OF)

The main goal when renovating should always be to design and build a space that will suit your needs and feel like a reflection of you (as well as your partner or family) for years to come. The amount of time, money, as well as physical and mental energy should not be lost on mistakes that can be prevented in the planning stages before anything begins, right?
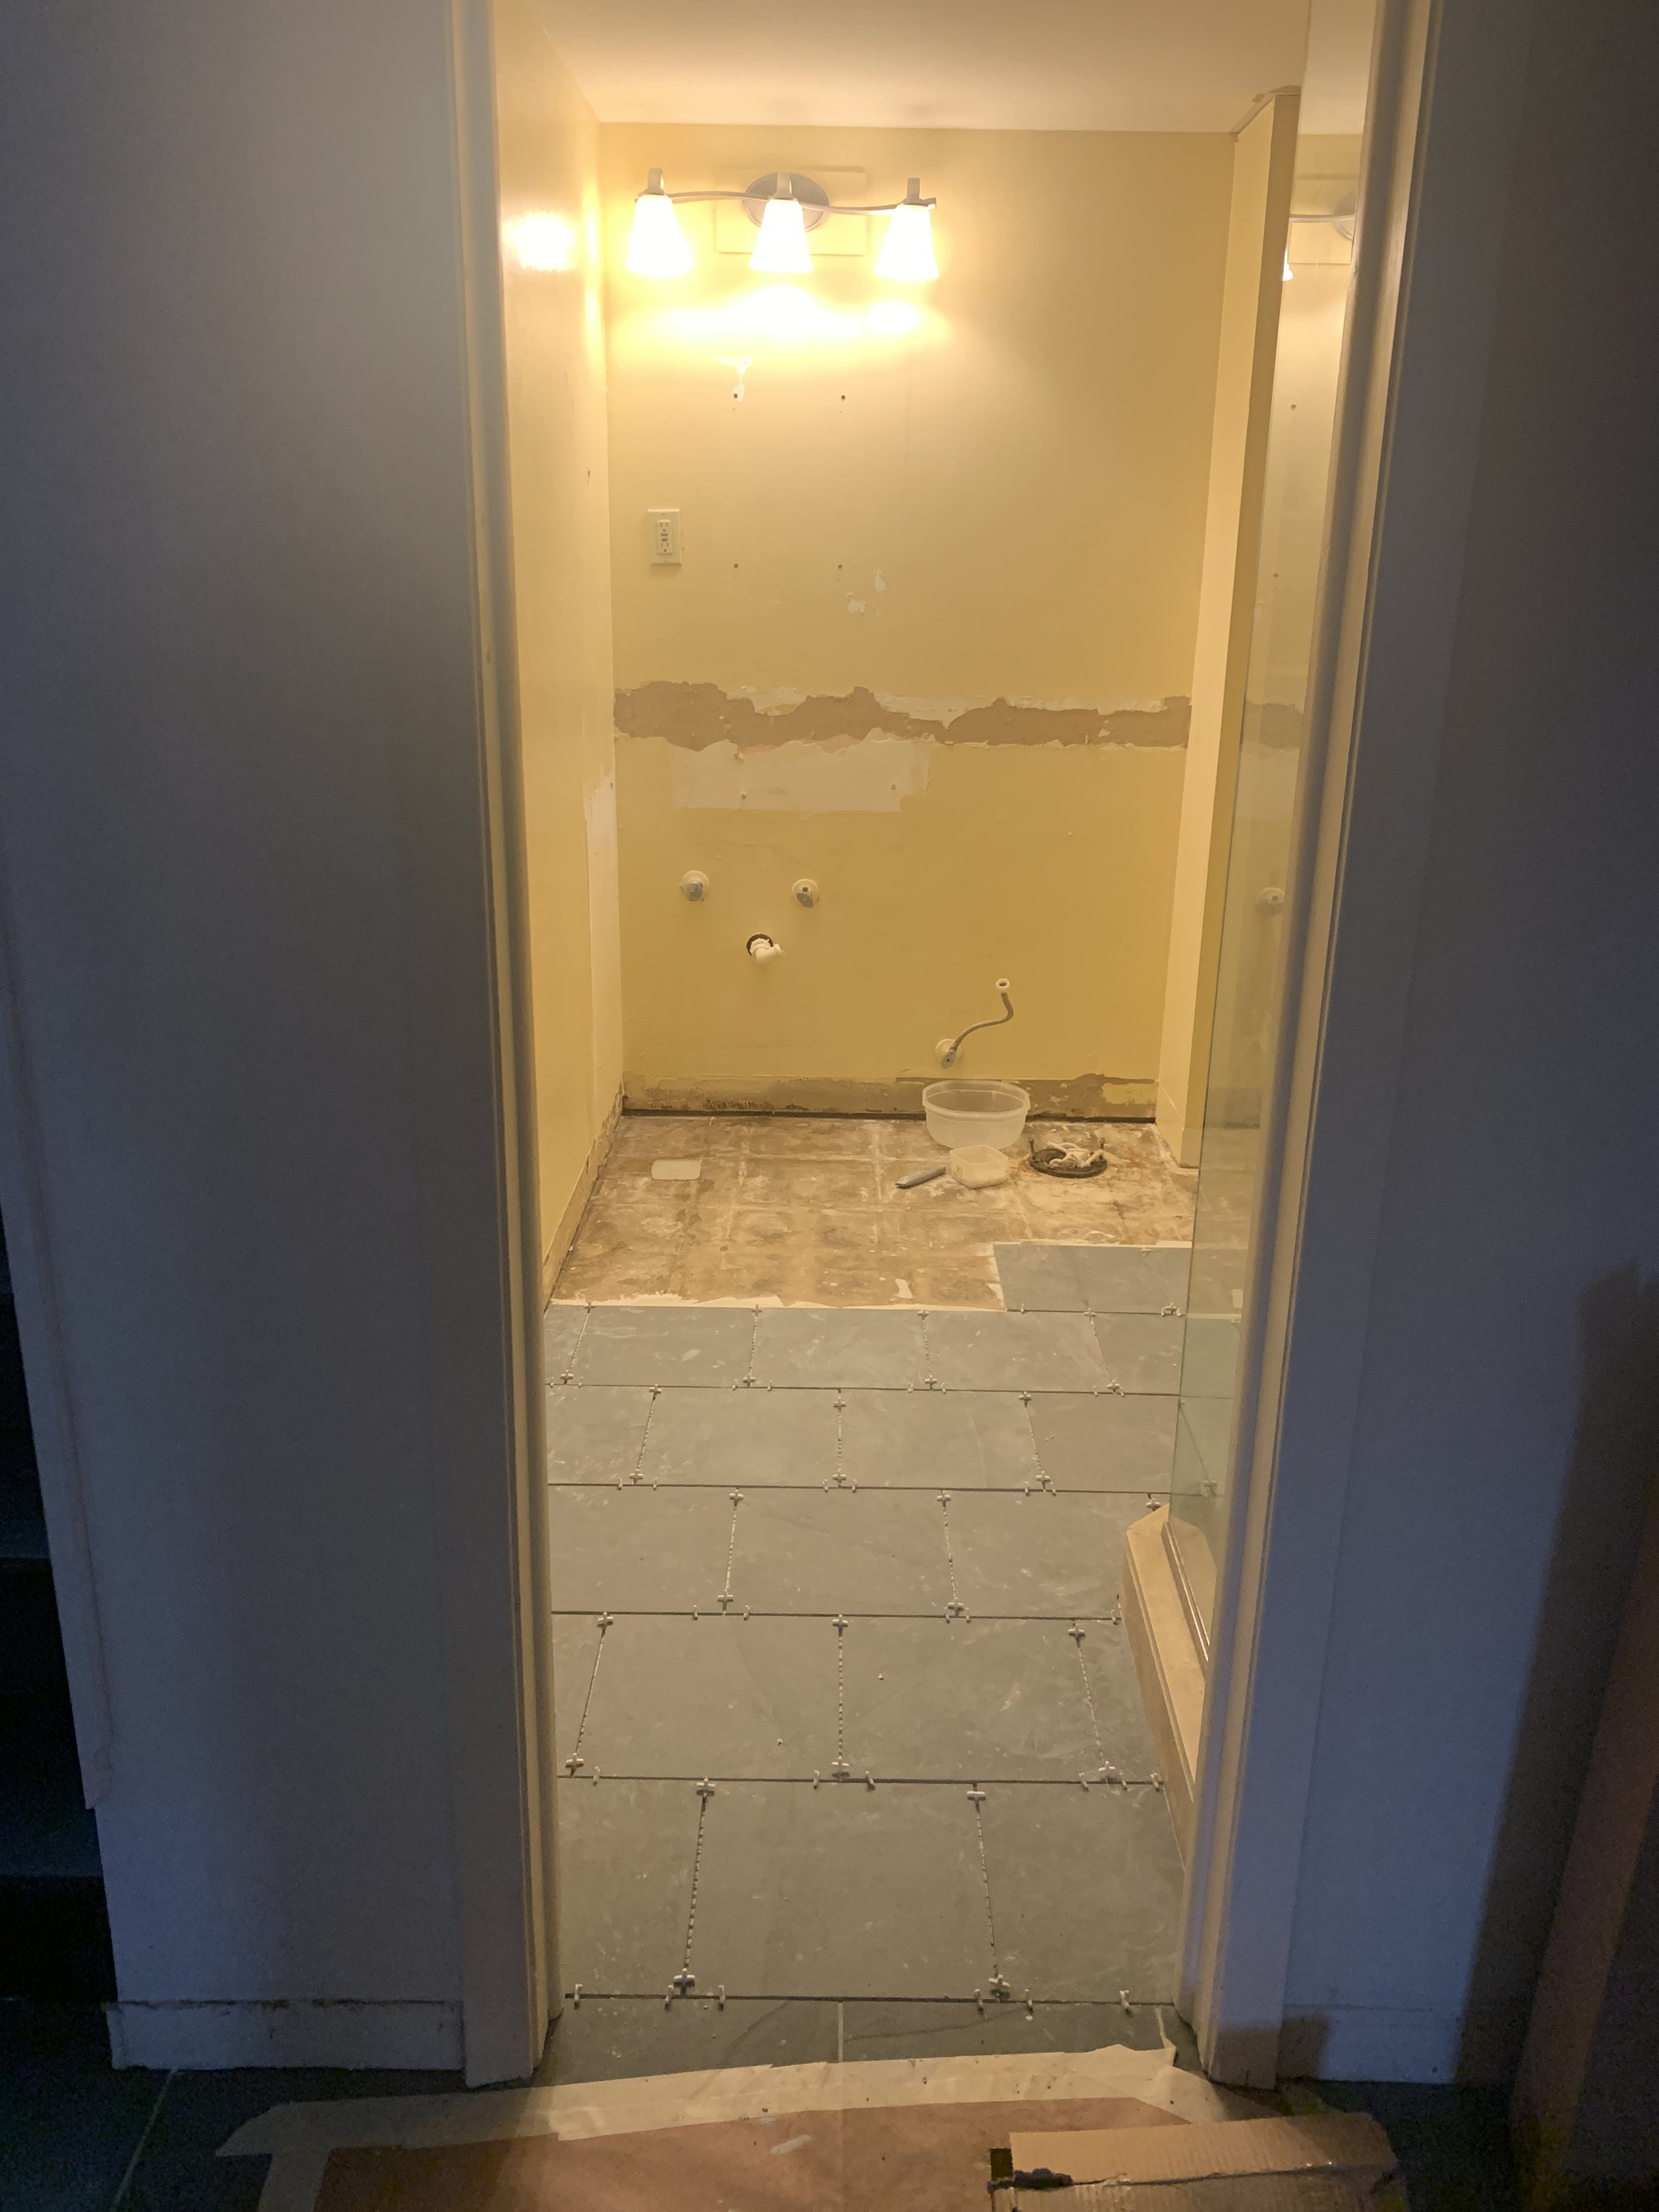
Unfortunately, this mentality is easier said than done sometimes. No renovation or interior refresh goes unscathed to some extent. Sadly for us, our small powder room in the main living space encountered an issue with paint and caulk viability. No matter how hard I tried to rectify the problem, it kept reemerging. The brand of paint and caulk did not get along, leading to a bright lime-green bleed through everywhere caulk was used. It would start showing up again and again every couple of weeks after I tried repainting.
After 2 years of trying various primers, I finally decided I was done trying to figure it out and would prefer to repaint (using a new brand of paint that I knew was compatible with the caulk used in the room). For me, re-painting meant an opportunity to try something new that felt more connected with the rest of the rooms in our home, but also felt like a better reflection of my personal aesthetic.
All photos of the space from the beginning to the end are provided for reference. While both renditions of this space have my heart, I can decidedly say I am so relieved to be finished with this bathroom, and very happy with the results.
I’ve listed the initial paint and caulk used, as well as the final paint selection. Please note, I do not hold the initial paint brand accountable for the problem. I have nothing against Farrow & Ball. This was a DIY project, and if I were to do this again, I would have initially asked the paint supplier in my area what caulk brands were recommended for this paint).
CAULK:
AFM SafeCoat, Caulking Compound
(highly recommend for chemical sensitivities, or those seeking a more non-toxic, low VOC caulk option).
GREEN PAINT:
Farrow & Ball Treron [No. 292]
PLUM PAINT:
Deepest Mauve [SW 0005]
Color Collections:
Historic Interior Color Wall, Victorian (1830s-1910s)


The lime-green bleed-through.


Before Updates.

HOW MUCH DID IT COST?
That nagging question hiding behind every perfectly tailored space you come across on Instagram, Pinterest, in magazines, and the like. How much did it cost? And, because I would love to scratch an itch for you, I thought it would be refreshing to openly share what we spent. My hope is to provide you with some insight to decision making and planning to help you get started on your own project.

That nagging question hiding behind every perfectly tailored space you come across on Instagram, Pinterest, in magazines, and the like. How much did it cost? And, because I would love to scratch an itch for you, I thought it would be refreshing to openly share what we spent. My hope is to provide you with some insight to decision making and planning to help you get started on your own project.
Since we did the labor ourselves and designed everything in house, our total bottom line only includes materials. If you are planning a remodel of your own, please keep in mind that labor and design/architectural fees can be some of the costliest (but most pertinent) parts of a project. It cannot go without saying that the value of good labor and good planning should not be overlooked.
Technically, this bathroom is a ¾ bath and includes a shower. Since we left the shower untouched, for the sake of where money was spent, let’s consider this a powder bath. All costs include tax and shipping. So, without further ado…
THE TOTAL COST OF THIS PROJECT CAME IN AT $5,380.00.
Below is how it all breaks down, along with some insight into where we chose to spend more, or less, and why.
STONE VANITY: $1630.00 (including mounting brackets)
This was the biggest splurge; it’s the main event and for me, worth every penny! Since the shower was in good shape and was more of a personal taste issue than a had to go because it’s so broken down or unbearably ugly item, financially (and for the planets sake!), it didn’t make sense to replace it. The goal was for the shower to blend in with the rest of the room. This sink, helped to accomplish that.
FAUCET: $520
There is a wide range you can expect to pay for a faucet. Right now, in 2023, I would say the typical range starts around $150 and goes all the way up to $2600 (give or take). I would consider our option to be a mid-range option. My non-negotiable on the faucet was a polished nickel finish. Polished nickel can often be a special-order option and depending on the brand can have slight upcharge (around 10% or so); so, keep this in mind when you are shopping. Nickel finish is a warmer silver tone than chrome and complimented our other selections in the space best. The existing shower fixtures were satin nickel, so I wanted to keep the plumbing fixtures in the space somewhat consistent.
ADDITIONAL PLUMBING PARTS: $345
Including but not limited to P-Trap, Shut-off Valves, Supply Lines, and other connection parts. This area is often overlooked when budgeting. More goes into making a faucet work than the faucet itself! This is where things got a bit more expensive for us since I opted for a polished nickel finish. Since we have exposed plumbing, I wanted the finishes to match. Anytime you want the parts typically hidden in a vanity to have a finish other than chrome or PVC, you can expect to pay more. In this case, we paid around $125 extra for upgraded finishes.
FLOORING: $450
The flooring in the bathroom is a 12x12” slate tile. The same flooring runs from the adjacent mudroom space, so this isn’t a precise cost number since it’s a fraction of a total cost that covers more than one area… but it’s a decent estimate of what it would cost if it were just in the bathroom.
LUMBER & MISCELLANEOUS BUILDING MATERIALS: $1,000
This includes wood for the baseboard, trim, and crown molding, as well as the linen cabinet shelves and wall paneling. The wall paneling accounts for the majority of this number and we chose to apply it for several reasons. For one, the walls were in rough shape in this room. They were a mixture of poorly applied, inconsistent wall texture, mixed with untextured wall, dents etc. It also ties into another bathroom upstairs where we also applied vertical paneling. Lastly, I feel it gives the space a little extra depth and interest to go along with the striking marble vanity.
HARDWARE/ACCESSORIES: $255
Includes towel hooks, cabinet door hardware, cabinet hinges, toilet paper holder etc.
WALL SCONCE: $365
MIRROR: $270
TOILET: $235
PAINT: $130
VENT COVER: $30
ART: $150
(Although I ended up switching it out for art I already had in a different area of our home)
The art of planning a home renovation large or small, is finding the right balance between what you need, what you want and what you can afford. Don’t let this number discourage you from modifying a space to fit your needs as everyone’s situation is unique. And that is the beauty of creating spaces. Your personal style, mixed with budget and pre-existing conditions, is a recipe for endless possibilities. Could we have done this for less? Yes. Could we have done this for more? Always. Whatever you do, don’t cut corners to save money, and try not to take yourself too seriously. It can be (almost always is) a stressful endeavor when renovating. I promise you though, the reward on the other side is worth the effort!
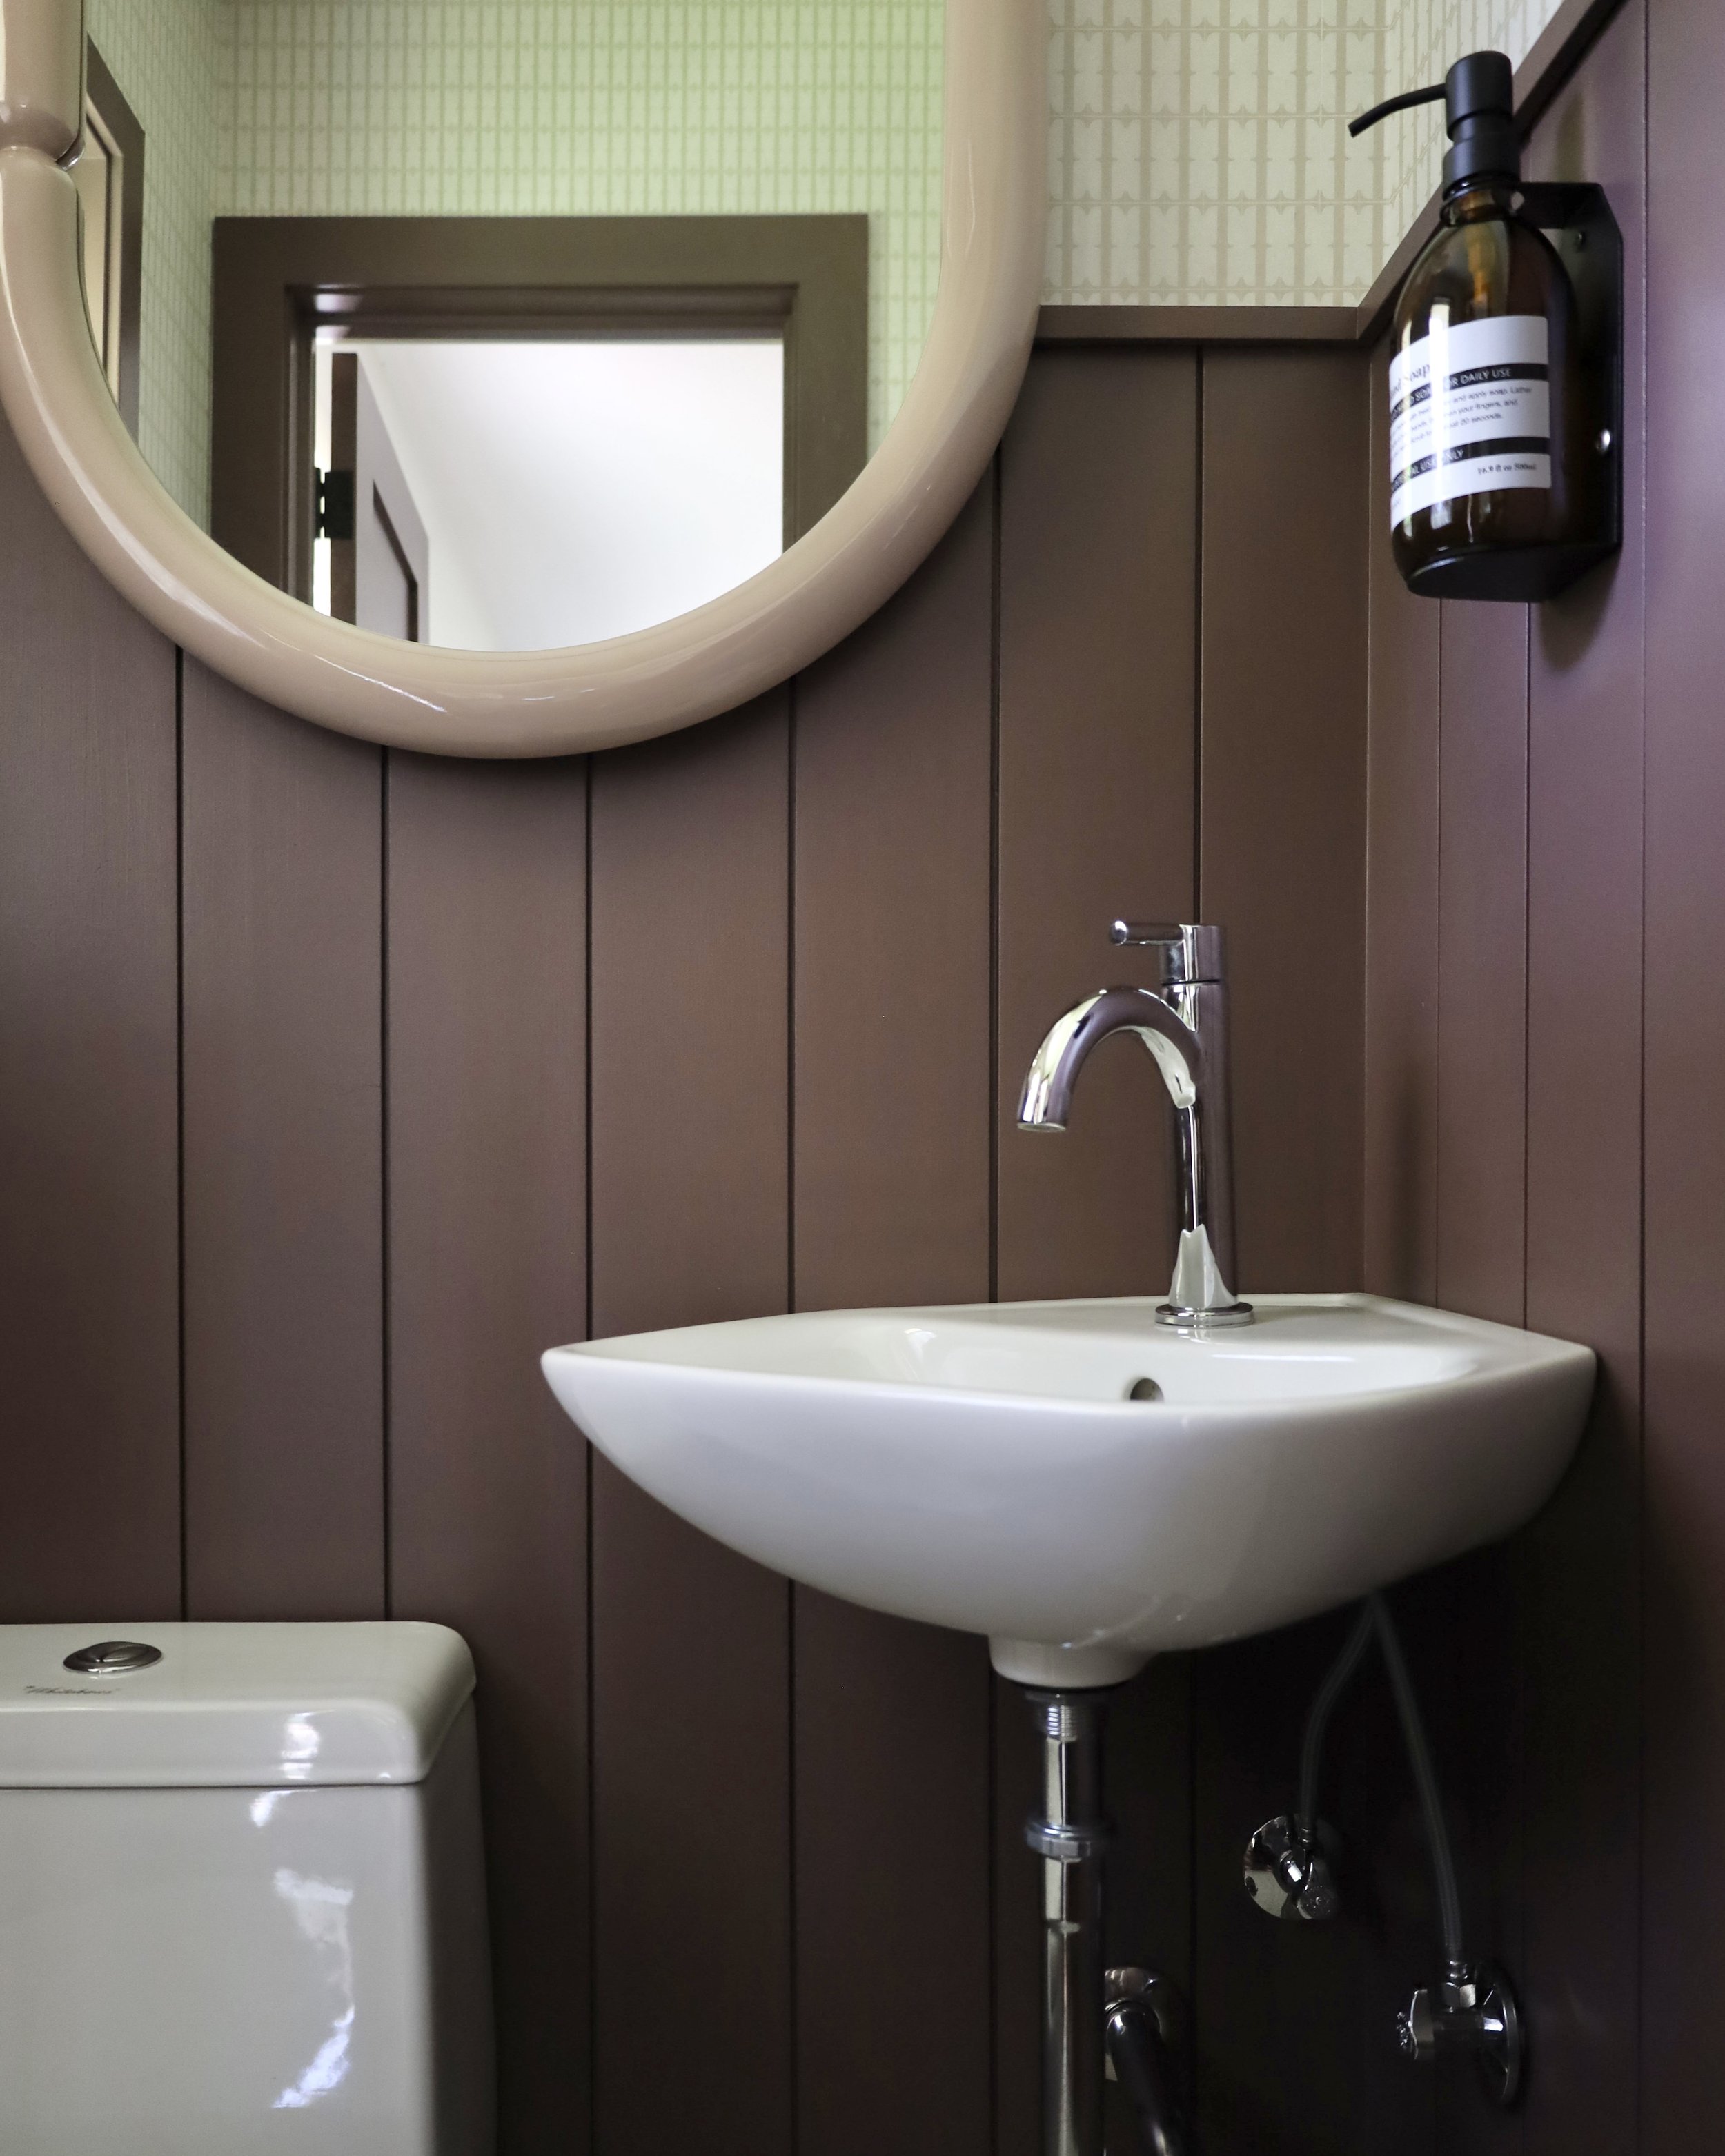
The Finished Space:


What the space looked like before and during the renovation:


The existing shower we chose not to replace for the time being.

FIVE QUICK TIPS FOR ORGANIZING YOUR PANTRY
5 quick tips for organizing your pantry.
Today, I am trying something new. My intention is to provide you with some value beyond pretty renovation photos and art. I would like to offer actionable content you can walk away with and potentially use to make your life a little bit easier.
So, in honor of spring cleaning, I am kicking things off with quick tips for organizing a pantry or dry goods area in your kitchen. Coming on two years post renovation, I can finally say I’m at a happy place with how things are organized in our pantry. Whether you have a designated room for your pantry, or one small cabinet, these rules can apply. Our dry goods are stored in a hutch style cabinet. These tips also work for organizing closets, bathrooms and more:
IT’S NEVER ACTUALLY DONE.
The goal here is to get to a stage where you can find a balance between knowing where everything is with relative ease, and not being overwhelmed by the mess. There will be some level of disorderliness, we aren’t going for a curated magazine-worthy space here, but we also don’t want to feel embarrassed when a guest comes over and wants to help in the kitchen or grab a quick snack. What I’m saying is, go easy on yourself. The only person you should be trying to impress is YOU!
TAKE YOUR TIME.
There is no deadline. Take time to figure out what works for you and what doesn’t. It took me 2 years to get to where I feel good about how everything is stored. Storage containers are also a big investment, and better purchased overtime once you know exactly what you want.
TAKE AN INVENTORY OF EVERYTHING YOU HAVE BEFORE YOU START.
It sounds overkill, but it truly is the best way to ensure everything will fit in the space you intend to put it. I learned this technique while working for California Closets and now apply it to every space I plan, most especially kitchens. When I plan a kitchen, I measure the linear inches of how much space certain items take up. For instance, my pots take up two shelves in a 27” cabinet. How many jars and what size will you need for X-Y-Z, how many bins will you need for A-B-C? Always plan for a little overage, as things typically take up more space than you anticipate. Over plan, and over buy. You can always return what you don’t need.
HAVE A MIXTURE OF BINS AND GLASS STORAGE CONTAINERS.
I have been collecting bins and jars for over a dozen years now. Bins conceal pre-packaged foods/snacks etc. and allow you to haphazardly throw things into a designated spot and be done with it; because let’s be honest, I’m not going to lovingly organize every kid fruit pouch I buy in order by color and variety.
For cost saving options try shopping thrift stores for bins and baskets, and use mason jars to store less frequently used flours, nuts, seeds, etc. I’ve included some links below on jars and bins I used for our pantry. If you bake, I highly suggest at the very least keeping your flours and sugar in a large glass container. Trust me, I waited too many years to be able to reach into a wide-open jar and scoop out flour without making a dusty mess out of my entire counter. They will also stay fresh longer this way. Having at least 2-3 large jars for this is worth the investment. We have 4 bins, and countless jars. Each bin is for a particular food category and is labeled. This will look different for everyone of course. Find what works for you and what your space will accommodate.

USE A LABEL MAKER/LABEL YOUR CONTAINERS.
They are relatively inexpensive and oh so satisfying to use. Labeling containers kind of forces you to put everything back in its place, maintaining all that hard work you spent time on initially. When you create a designated jar to store dry goods in, it also incentivizes you to start buying more items in bulk, which saves you money and is a more earth friendly way to buy your food. I’ve linked the one I purchased recently that is Bluetooth enabled and can print right from your phone.

* BONUS TIP:
You can use masking tape to label things if you aren’t ready to buy a label maker. I still use masking tape on the top of my jars to add quick cooking instructions for rice, flour mixes and grains that either came from the original packaging or from the cooking instructions on the bulk bin at the store. If buying in bulk, take a photo of the cooking instructions at the store so you can write it down when you get home.

My “finished’ pantry.
Click the images below for links to products mentioned in the post

Set of 3 glass jars.

Set of 2 large glass jars for flours.

Canvas storage bin.

SUPVAN label maker machine.